Build Public Integrations
Public integrations use OAuth authentication to easily install and authenticate with merchants' stores. They can also can be listed Bold Account Center to support the Bold community.
Public versus private integrations
Public integrations can be installed on multiple stores and use OAuth authentication. Private integrations can also be installed on more than one store, but each store owner must create and give an API access token to the developer.
Want more information on how to get started building a private integration? Check out the Checkout Overview.
Prerequisites
Before you get started, complete the following steps:
- Identify which platform you are using. If you use a platform other than those supported by Bold, you can build a custom platform connector for your shop. Read the Platform Connector Overview to learn more.
- Install one or more Bold apps on your platform before completing the following steps. Read detailed installation guides for Bold apps on the Bold Help Center.
Create accounts
You need two accounts to build a public integration: a Bold Account Center account, and a Bold Developer Dashboard account.
Bold Account Center account
If the store is already registered in the Bold Account Center, reach out to the store administrator of that store and request an invitation to join.
To create an account and connect your store in Bold Account Center, complete the following steps.
- On the Bold Account Center login page, click Create account.
- Complete the Name, Organization, Email, and Password fields. In this case, Organization usually refers to your company's name. This value is used to identify the stores associated with your account.
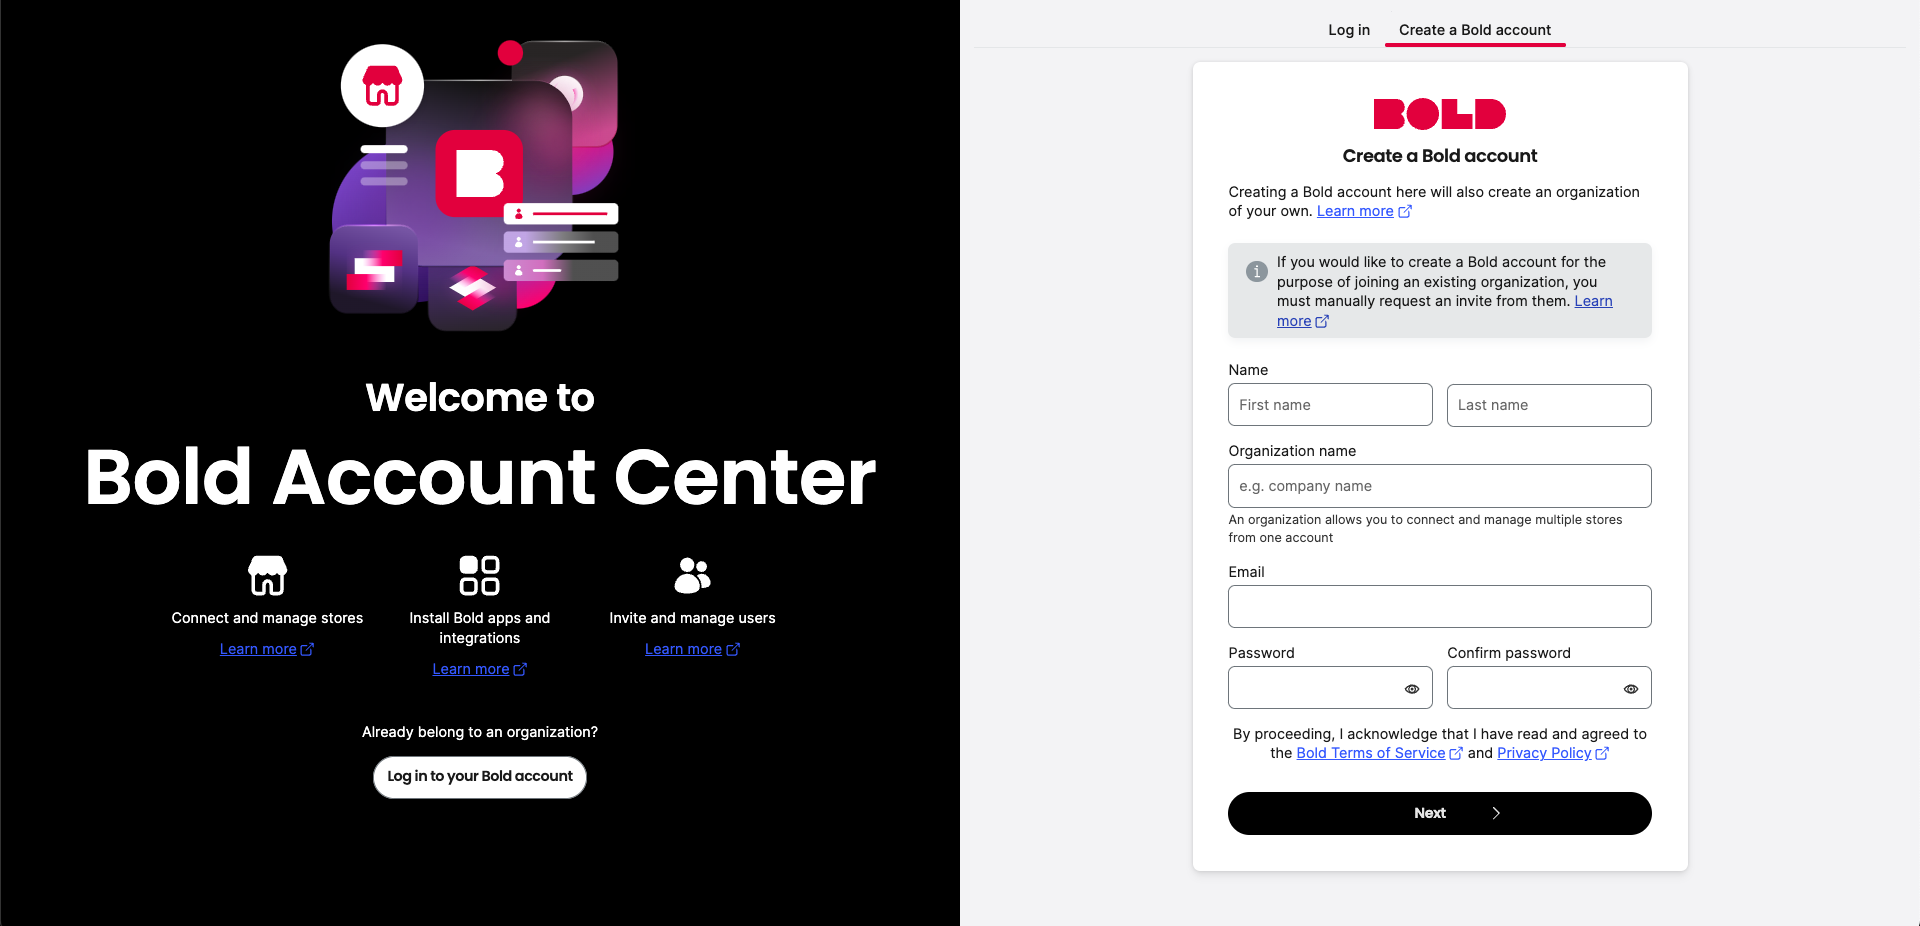
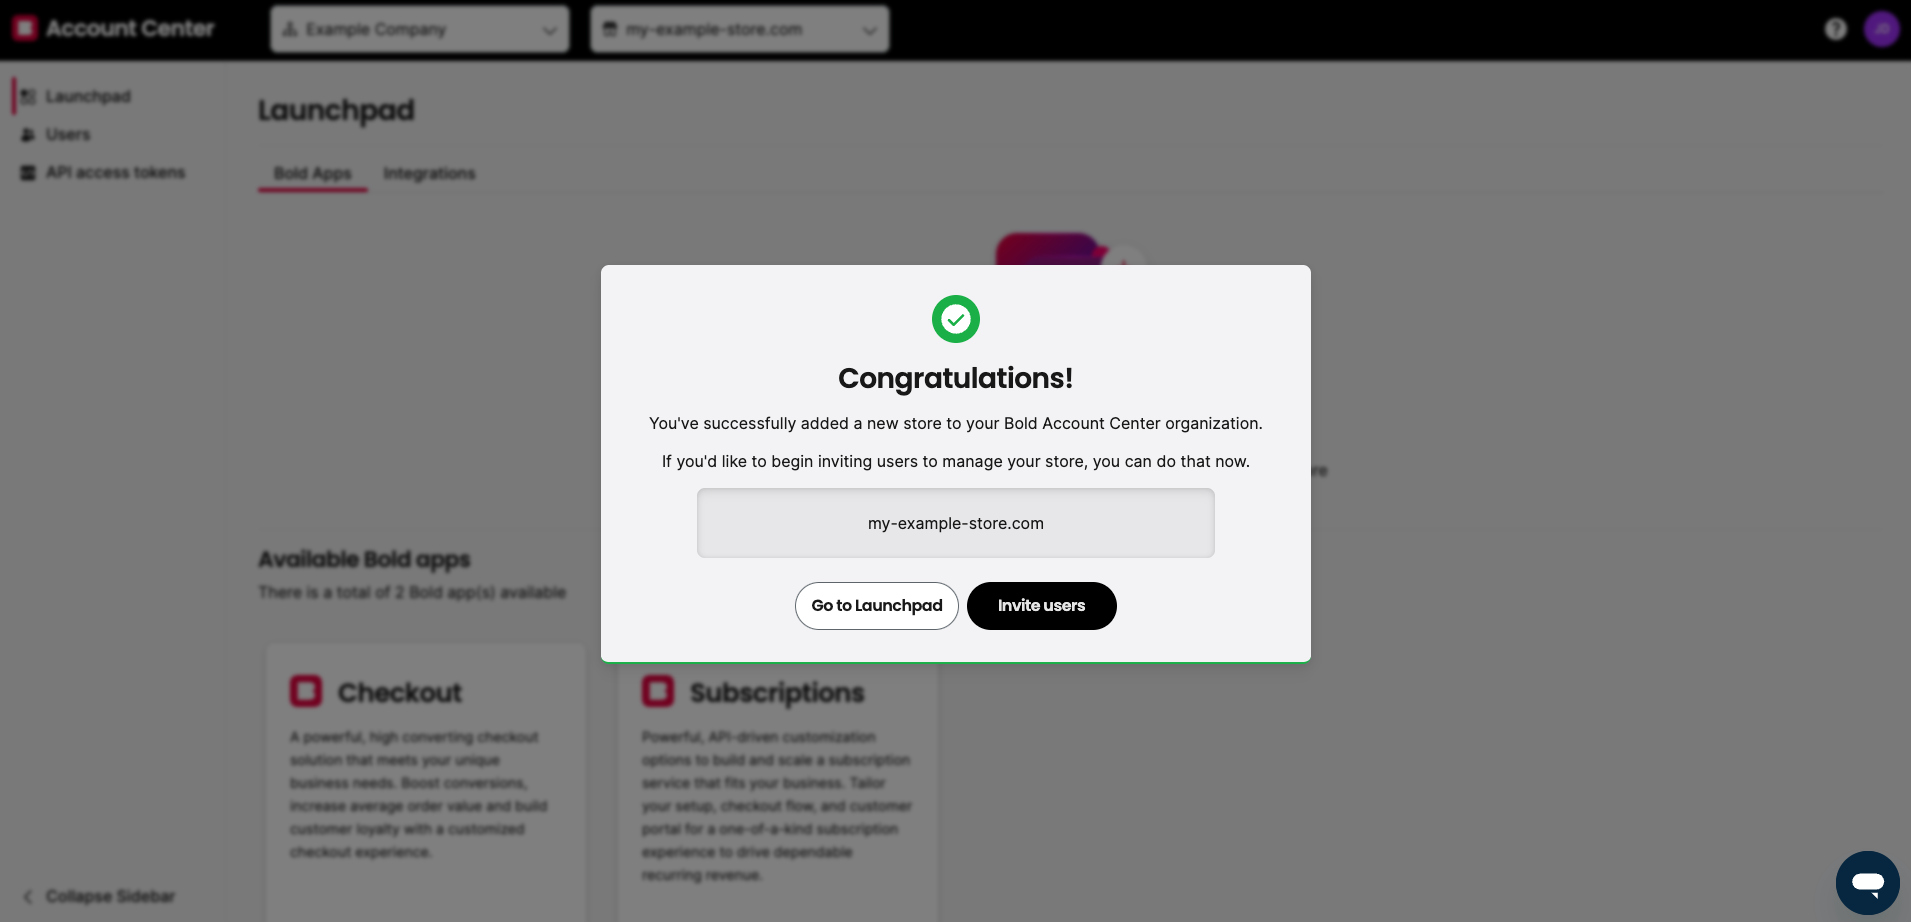
- Click Next. You are redirected to a new screen where you can add your first store.
- In the pop-up dialog, you can invite new users to your organization or go to Launchpad, where you can manage your store.
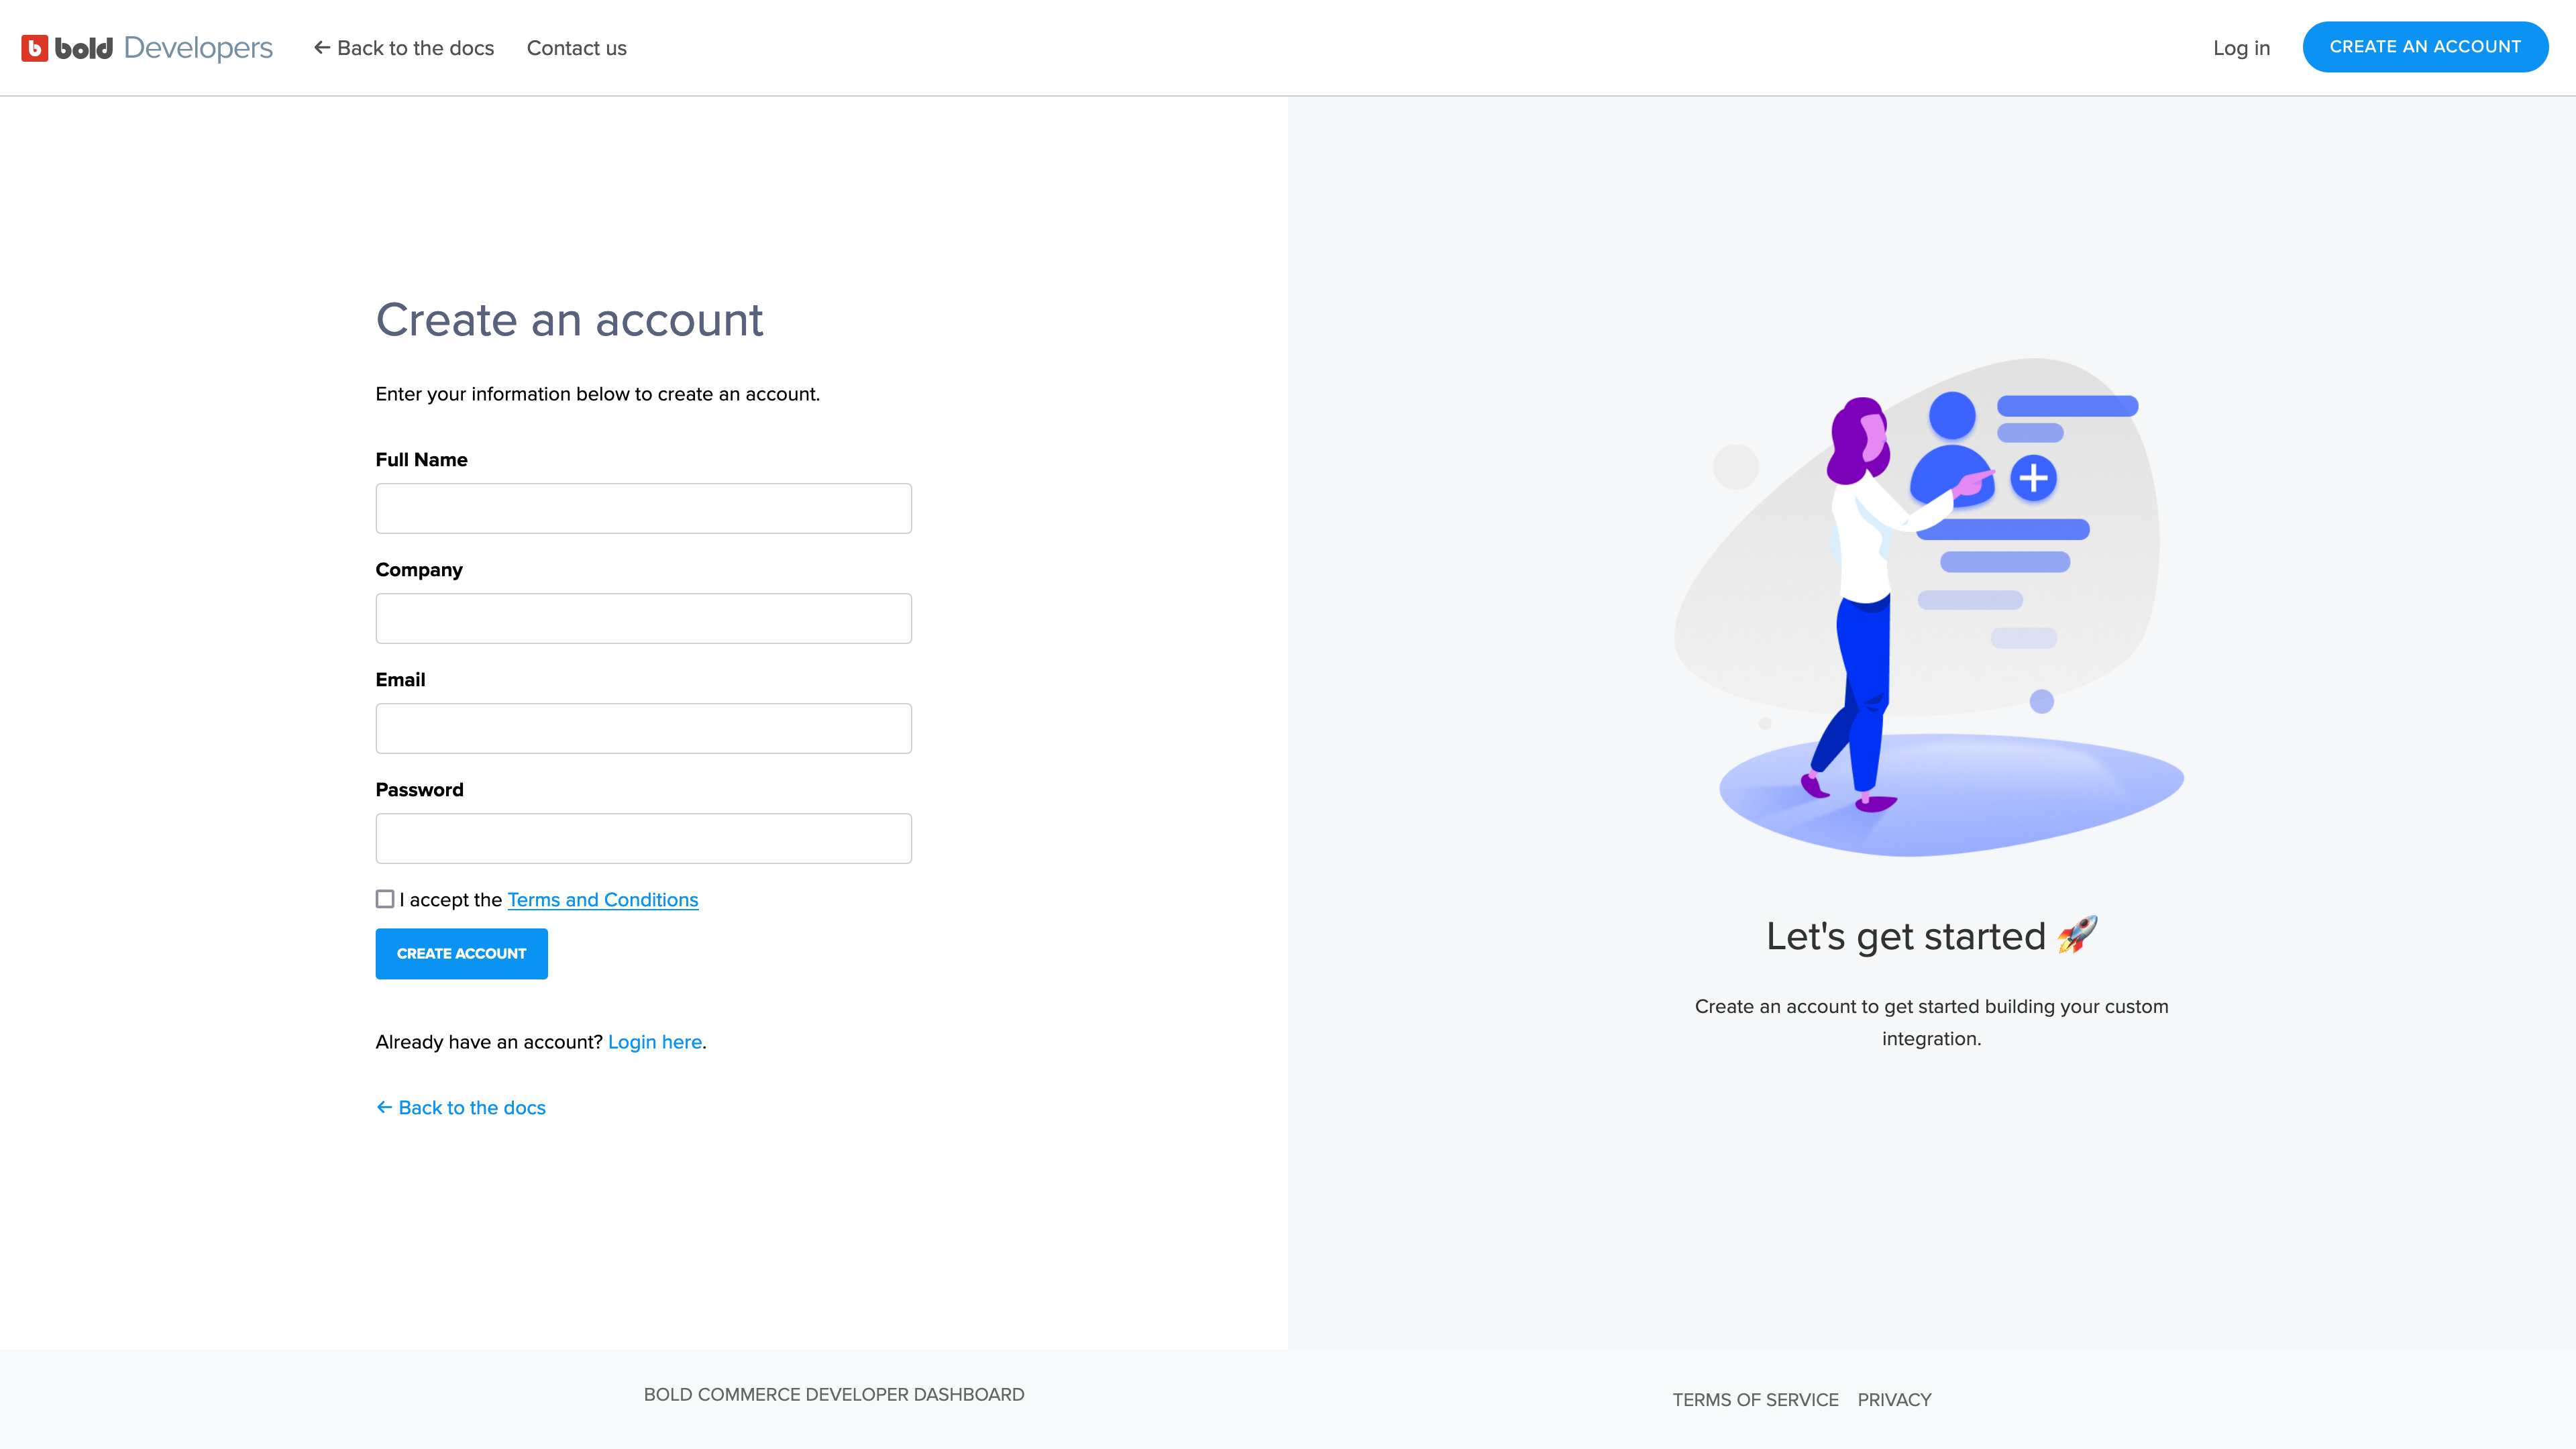
Bold Developer Dashboard account
The Bold Developer Dashboard enables you to make requests to Bold APIs. With this account, you can generate a client ID and specify your redirect URI for OAuth authentication.
To create an account and prepare your integration for install, complete the following steps.
- Create a Bold Developer Dashboard account here.
- Navigate to your developer dashboard.
- Click Create API Credential.
- Specify your application's name and redirect URI (e.g.,
https://myapp.example.com/complete_install). - Note the generated
client_id.
Authenticate your integration
For each store your integration is installed on, you must request (and receive) access scopes from the store administrator, and generate an API access token.
To avoid re-use of API access tokens, each store requires a unique token. Once generated, API access tokens do not expire, and refresh tokens are not required.
Request permissions
When a merchant installs your integration, you must prompt them to authorize your request for the access scopes your integration requires. The following code sample shows an example of directing the merchant to an install page in Bold Account Center:
https://apps.boldapps.net/accounts/dashboard/authorize?client_id={client_id}&scope=read_products&redirect_uri=https://myapp.example.com/complete_install
| Field | Description |
|---|---|
client_id | The client ID generated by creating credentials on your developer dashboard. |
scope | The comma-separated list of access scopes your application requires. |
redirect_uri | The URL to redirect the merchant to after they accept scopes. |
The following screenshot shows the install page in Bold Account Center.
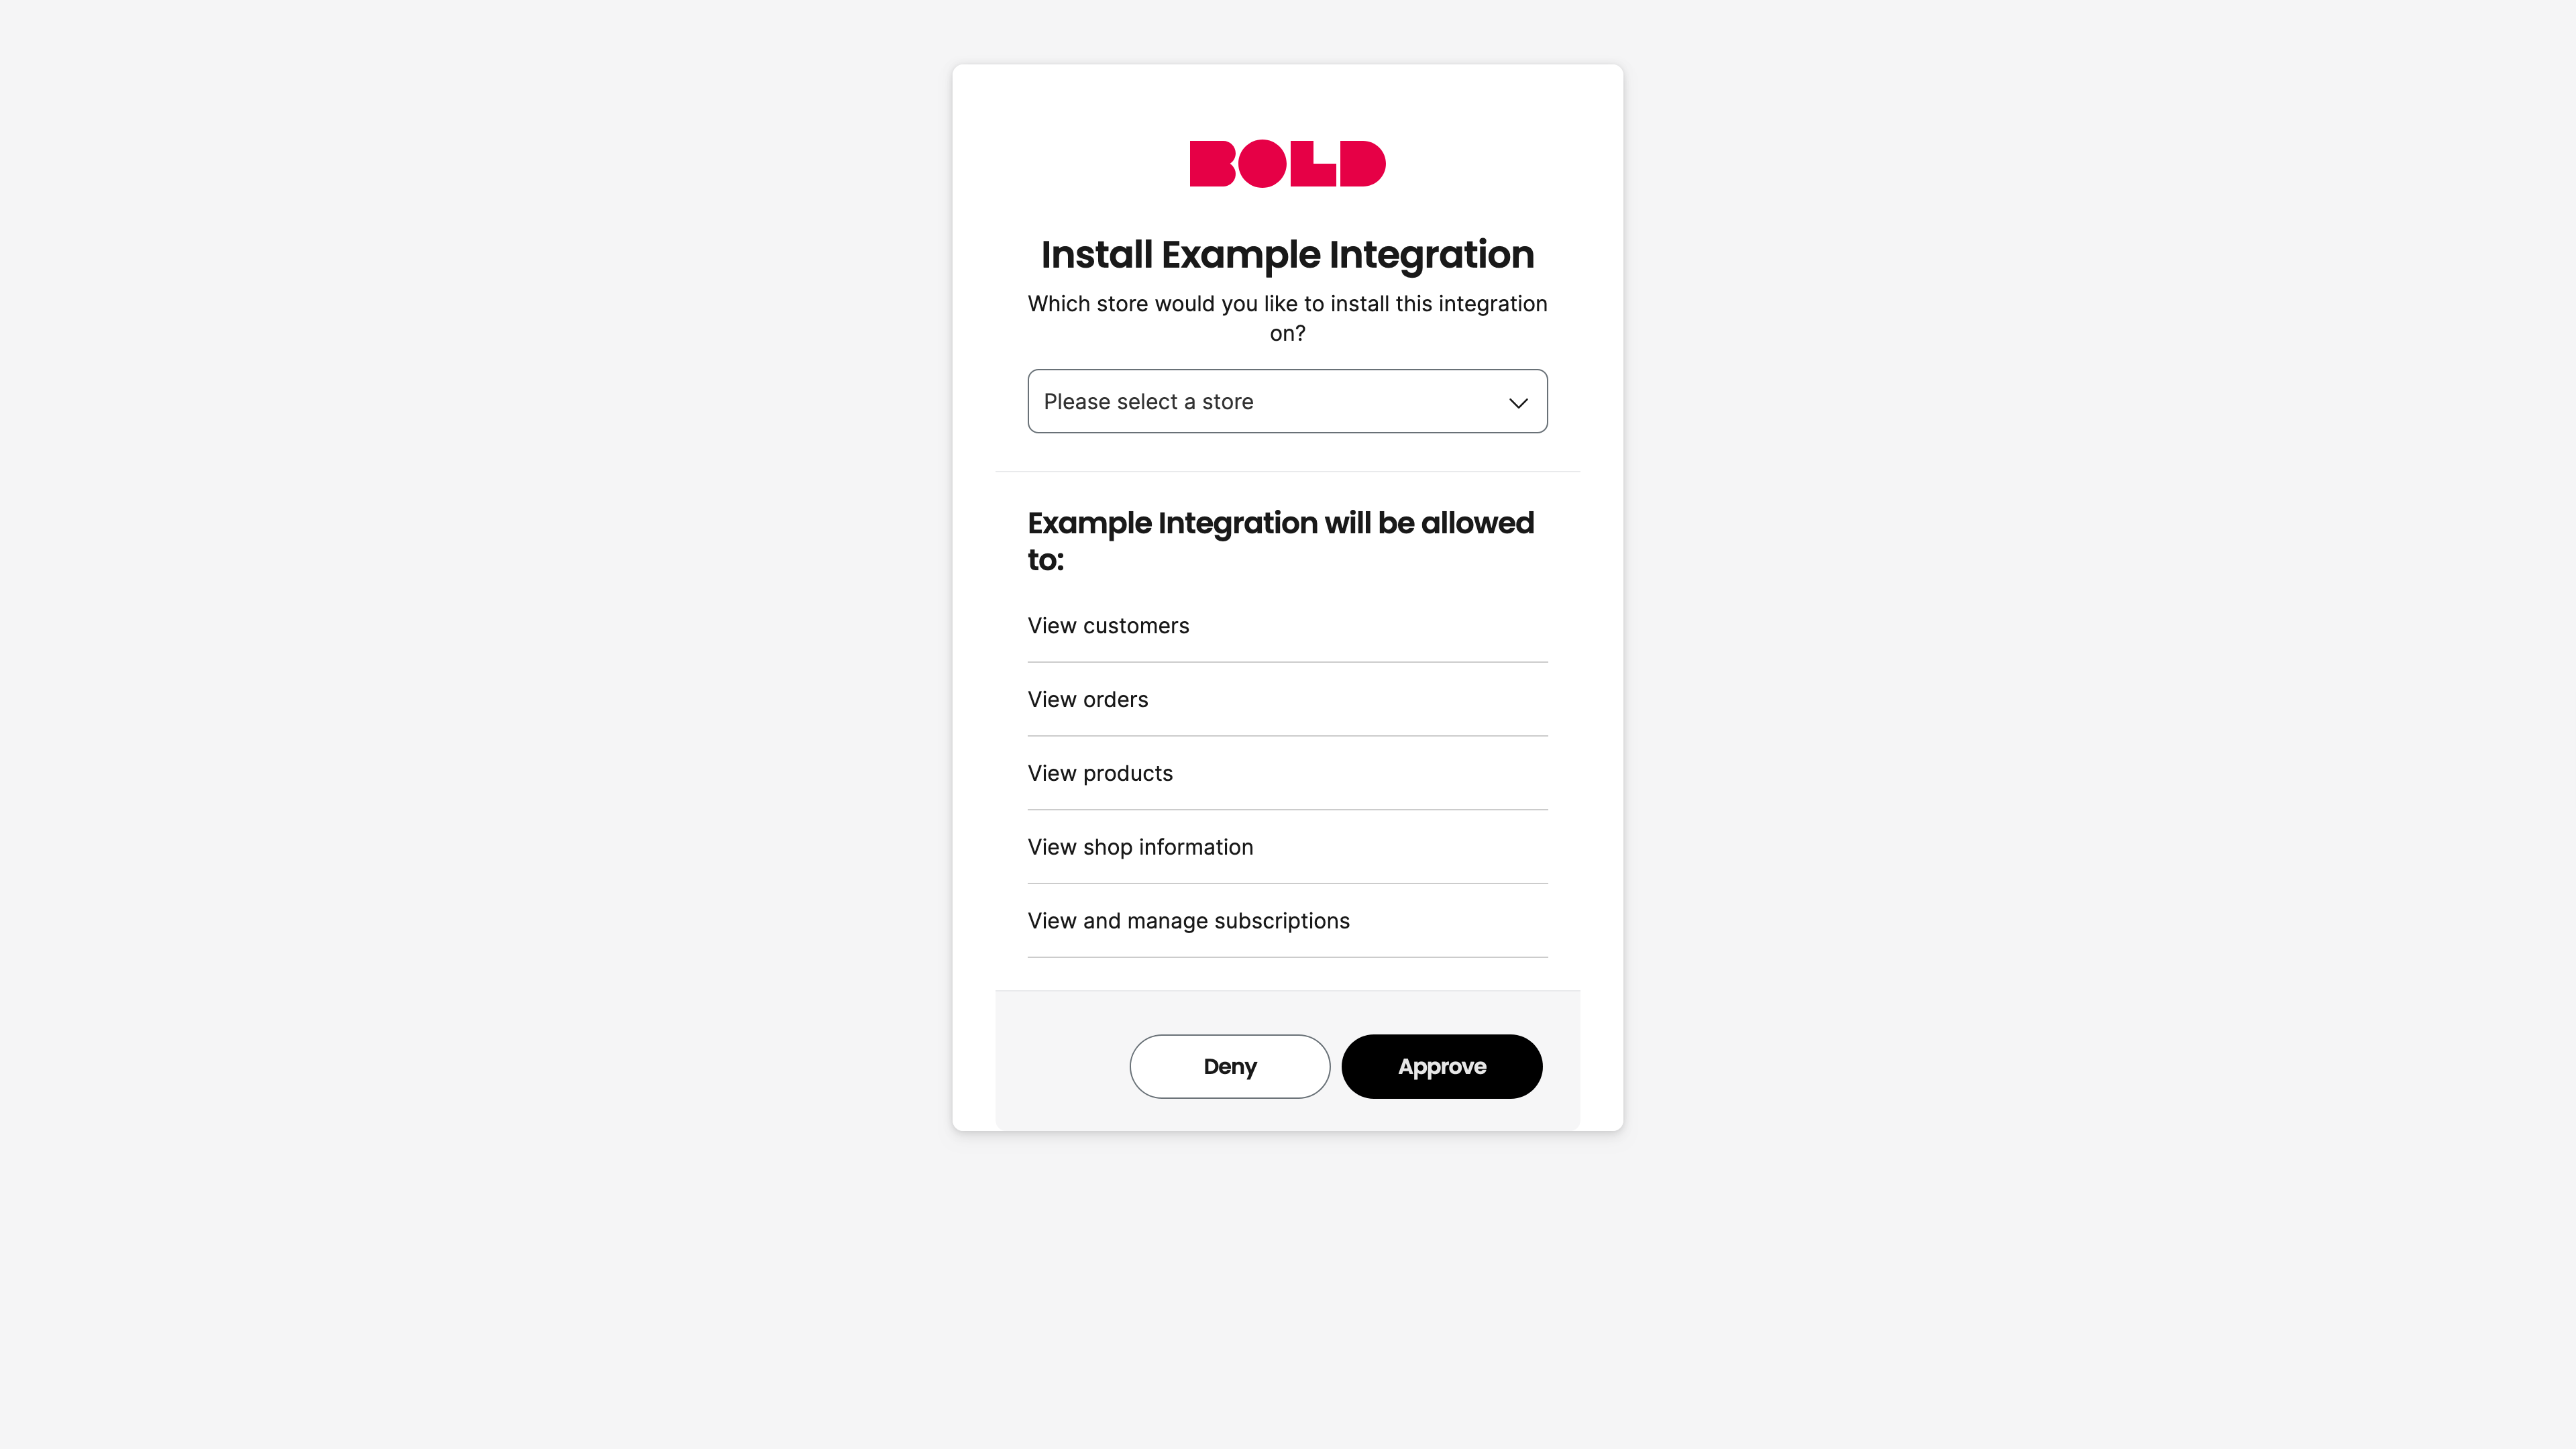
Accept granted permissions
Once the merchant grants the required access scopes, their browser redirects them to your defined redirect_uri.
Your application receives a request with a query parameter named code.
https://myapp.example.com/complete_install?code=OoChaiphaiLoWohgh2hae3ahchiy9iu9
| Field | Description |
|---|---|
code | The authorization code from the redirect request to your application. |
Exchange code for an API access token
Exchange the code value for an API access token associated with the merchant's store. The following shows an example using cURL to exchange the code for a token:
curl --request POST 'https://api.boldcommerce.com/auth/oauth2/token' \
     --header 'Content-Type: application/x-www-form-urlencoded' \
     --data 'client_id={client_id}&grant_type=authorization_code&client_secret={client_secret}&code={code}'
| Field | Description |
|---|---|
client_id | The client ID retrieved from creating credentials within your developer dashboard. |
grant_type | Must be set to the string value of authorization_code. |
client_secret | The client secret retrieved from creating credentials within your developer dashboard. |
code | The authorization code from the redirect request to your application. |
Store the API access token from the response
The JSON response you receive from the merchant contains an access_token field, which you must save for future API requests to that store.
The following is an example JSON response:
{
  "token_type": "bearer",
  "access_token": "2YotnFZFEjr1zCsicMWpAA"
}
If an error occurs, contact the Bold support team.
Make your first request
Each Bold API request accesses https://api.boldcommerce.com. This section describes the common parameters of each request and walks through examples to show functionality.
Request data
You can make most API calls using the following cURL request format:
curl --request {METHOD} 'https://api.boldcommerce.com/{api}/{version}/shops/{shop_identifier}/{resource}' \
     --header 'Authorization: Bearer {access_token}'
| Field | Required | Description |
|---|---|---|
METHOD | Yes | The request CRUD operation to perform. |
api | Yes | The Bold API to access. See the full list of Bold APIs. |
resource | Yes | The Bold API endpoint to access. Example: line_items, products, etc. |
shop_identifier | Yes | The shop identifier retrieved from the Get Shop Info endpoint. |
Authorization | Sometimes | Only required for authenticated APIs. Replace {access_token} with the API access token you created above. |
To test Bold API requests, copy and paste the following commands into your command line interface.
Don't forget to replace {access_token} with the unique token generated in the Store the API access token from the response section.
Get your shop identifier
Use the Get Shop Info endpoint to get your shop_identifier and other basic shop info.
curl --request GET 'https://api.boldcommerce.com/shops/v1/info' \
     --header 'Authorization: Bearer {access_token}'
Your CLI returns a JSON response with details of your store. Note the shop_identifier value for the next call.
Confirm your products are synced to Bold
Using the List Products endpoint, check that your products are synced to Bold. Replace {shop_identifier} with the shop_identifier value from the previous call.
curl --request GET 'https://api.boldcommerce.com/products/v2/shops/{shop_identifier}/products' \
     --header 'Authorization: Bearer {access_token}'
Your CLI returns a JSON response with details of existing products in your store.
If either request fails, reach out to the Customer Success team.
Explore Bold APIs
Get started with other APIs:
- The Bold Checkout APIs are a flexible checkout solution suite, offering APIs that create a custom, high-converting transaction experience. Customize your checkout at any level with the Checkout Frontend, Checkout Backend, and Checkout Admin APIs.
- Bold Subscriptions allows you to generate recurring revenue for your merchants through product subscriptions.
- Bold Price Rules is a robust and flexible pricing and promotions engine, allowing you to create customizable pricing structures and promotions.
Launch your integration
Public integrations can be either published or unpublished:
- Published integrations are available in the Integration Marketplace for anyone with an account in Bold Account Center.
- Unpublished integrations are by default unavailable in the Integration Marketplace, but you can request that Bold makes them available for select stores.
By default, public integrations are unpublished.
To publish your public integration, reach out to the Bold Partners team. Provide the following information in the details of your request:
- If you want your integration to be published (publicly accessible) or unpublished (accessible to specific stores).
- If you choose to leave the store unpublished, please include the store names and shop identifiers of the shops you want to grant access to the integration.
- The client ID of your API credential in the Bold Developer Dashboard, obtained in the Create client credentials section.
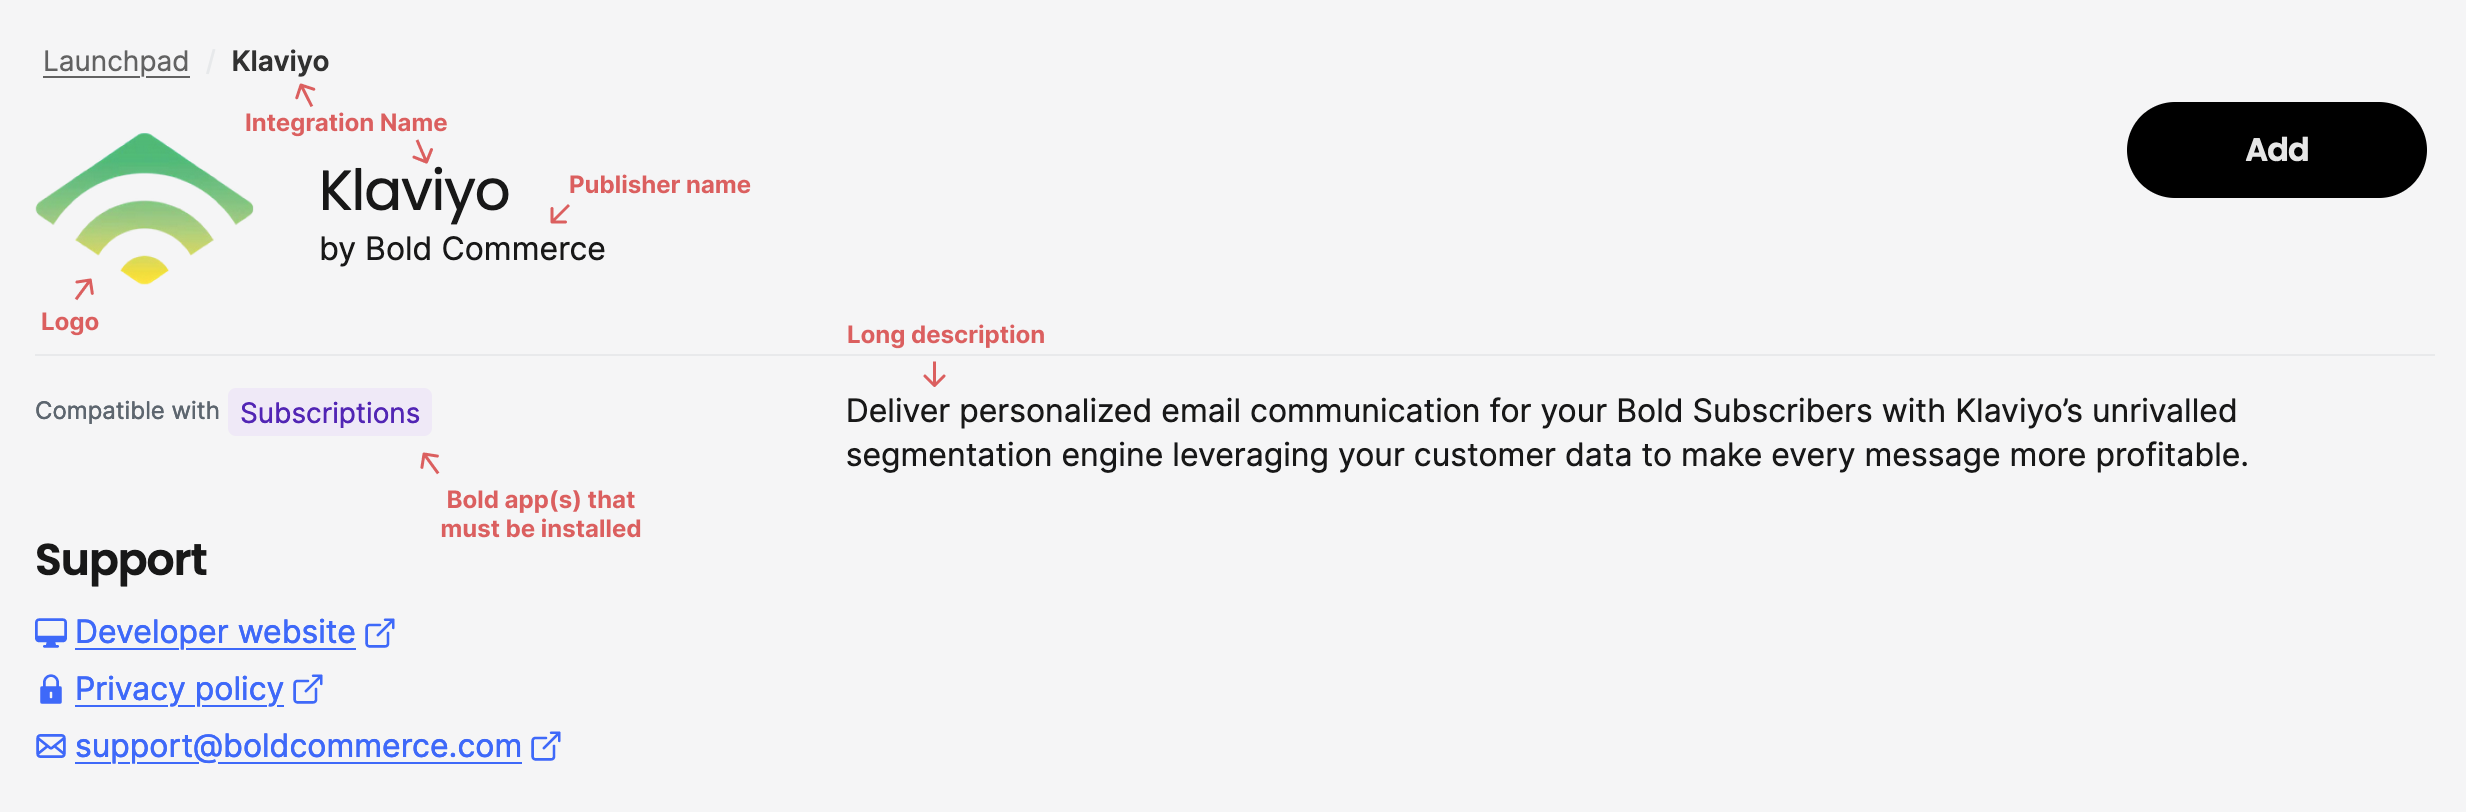
- The name of the integration.
- The name of the publisher. This is presented on the integration listing in the Integration Marketplace.
- The logo.
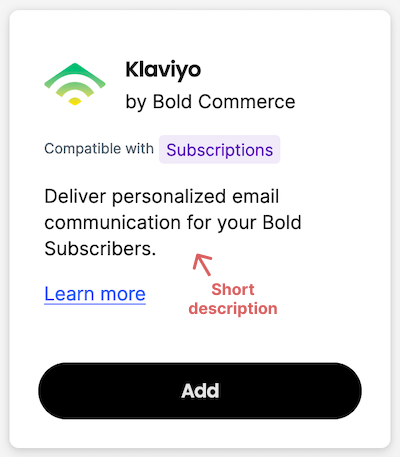
- Bold accepts JPEG or PNG images only, with a maximum file size of 800 kB. The logo is displayed at 120 px by 120 px on the integration detail page and 50 px by 50 px on integration listing cards.
- The short description of the integration. This must not exceed 130 characters. This text appears on the integration listing in the Integration Marketplace.
- The long description of the integration. This must not exceed 65535 characters. This text appears on the integration details page.
- The URL of the integration used to supply scopes, when the integration redirects back to the Bold Account Center to accept granted access.
- If the integration has an admin interface that can be opened from the Integration Marketplace.
- If so, provide the load URL Bold can access to load the user interface.
- If any Bold applications must be installed on a store before the merchant can install the integration.
- If so, provide the necessary Bold applications.
Once Bold receives your request, we review your integration and launch it when ready.
The following screenshots show the Klaviyo integration (published by Bold) marketplace card and details page:
Provide a user interface for your integration (optional)
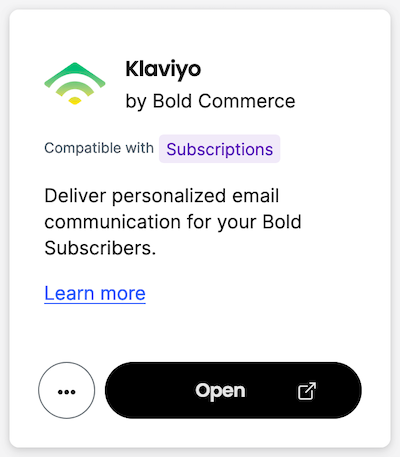
If you provide a user interface for your integration, users can access the interface from your integration card in the Bold Account Center.
- Navigate to the Bold Account Center Launchpad page.
- Click the Integrations tab.
- Press the Open button on the your integration.
The following screenshot is an example of the Klaviyo integration card once installed.
Handling the load request (optional)
Pressing the Open button prompts Bold to send a GET request to the integration's load URL. The load URL is the endpoint serving your integration's user interface, as given in the request to the Bold support team when launching your integration.
The following request is an example of Bold's call to the load URL:
curl --request GET 'https://example.com/admin?shop_identifier={shop_identifier}&bold_timestamp={bold_timestamp}&hmac={example_hmac}'
The request includes the following query parameters:
| Field | Description |
|---|---|
shop_identifier | The unique identifier for the shop requesting access to the integration's user interface. |
bold_timestamp | An integer representing the timestamp of the request. This can be used to prevent replay attacks. |
hmac | A hex-encoded SHA256 hash of the request, which functions as a request signature. |
Each call from Bold is accompanied by an HMAC (hash-based message authentication code) signature. Bold constructs this signature by hex encoding a SHA256 hash of the entire request body and your shared secret.
Upon receiving the load request, confirm that the request came from Bold by verifying the signature.
Important: Verifying request signatures is a security measure that mitigates the risk of this endpoint from being spoofed by a malicious actor. Failure to implement this measure could result in a disruption of service or theft of data.
The following PHP code sample includes an example of verifying the HMAC signature provided in the request:
public function verify($request) {
    $providedTimestamp = (string) $request->get('bold_timestamp');
    $currentTimestamp = now()->timestamp;
    $upperLimitTimestamp = $currentTimestamp + 30;
    $lowerLimitTimestamp = $currentTimestamp - 30;

    // A one-minute window is allowed for this request. The same request made at a later time will fail verification.
    if ($providedTimestamp < $lowerLimitTimestamp || $providedTimestamp > $upperLimitTimestamp) {
        return false;
    }

    $hmac = $request->get('hmac');

    // This value should exactly match the load URL you configured in the Bold Account Center.
    // eg. If your user interface is located at /admin, the load URL is your APP_URL/admin.
    $loadUrl = env('APP_URL').'/admin';
    $messageElements = [
        $loadUrl,
        $request->get('shop_identifier'),
        env('BOLD_CLIENT_ID'),
        $providedTimestamp,
    ];

    $message = implode(':', $messageElements);
    $secret = env('BOLD_CLIENT_SECRET');
    $calculatedHmac = bin2hex(hash_hmac('sha256', $message, $secret, true));

    return hash_equals($calculatedHmac, $hmac);
}
Uninstall your integration (optional)
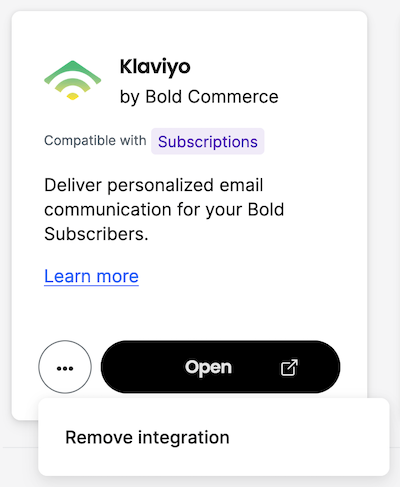
You can uninstall integrations in the Bold Account Center.
- Navigate to the Bold Account Center Launchpad page.
- Click the Integrations tab.
- Click the ... menu on the unwanted integration. Click Remove integration.
- Review the information in the pop-up. Once you're sure you want to proceed, click Remove integration.

Handling the uninstall request (optional)
Pressing "Remove integration" prompts Bold to send a request to the integration's configured admin webhook. As a user, handling this request is optional. Bold continues retrying this request until we receive a successful HTTP response (e.g. 2xx) or 10 failed response codes.
The uninstall request has the following headers and fields:
curl --request POST 'https://example.com/custom/integration/uri' \
     --header 'X-BoldPlatform-Topic: integration/uninstalled' \
     --header 'X-BoldPlatform-HMAC: e3b0c44298fc1c149afbf4c8996fb92427ae41e4649b934ca495991b7852b855' \
     --header 'X-BoldPlatform-Webhook-Version: v1' \
     --header 'User-Agent: BoldPlatform-Webhook-Forwarder/1.0' \
     --header 'Bold-API-Version-Date: 2022-05-01' \
     --header 'Content-Type: application/json' \
     --data '{
         "shop_identifier": "shop_identifier",
         "topic": "integration/uninstalled",
         "data": {
             "type": "integration_id",
             "id": "bold_generated_integration_id",
             "metadata": null
         },
         "occurred_at": "current_time"
     }'
| Headers | Description |
|---|---|
X-BoldPlatform-Topic | The type of webhook request performed. When uninstalling, topic will always be integration/uninstalled. |
X-BoldPlatform-HMAC | An HMAC signature calculated with the SHA256 algorithm, using the entire request body and shared secret. To verify the HMAC signature, refer to Verify the uninstall request signature section. |
X-BoldPlatform-Webhook-Version | The current version of the Bold webhook service. |
User-Agent | The Bold webhook service. |
versionDate | The publish date of the Bold API in use. |
| POST Body Field | Description |
|---|---|
shop_identifier | The shop identifier retrieved from the Get Shop Info endpoint. |
topic | The type of webhook request performed. When uninstalling, topic is always integration/uninstalled. |
data[type] | The integration identifier. |
data[id] | The Bold-generated integration identifier. |
data[metadata] | Any metadata associated with the integration. |
occurred_at | The time the uninstall request was sent, in UTC format. |
Verify the request signature
Each call from Bold is accompanied by an HMAC (hash-based message authentication code) signature. Bold constructs this signature by Base64 encoding a SHA256 hash of the entire request body and the shared secret.
Upon receiving the uninstall request, confirm that the request came from Bold by verifying the signature. The following PHP code sample includes an example of creating an HMAC signature, which you can verify against the signature in the request.
Important: Verifying request signatures is a security measure that mitigates the risk of this endpoint from being spoofed by a malicious actor. Failure to implement this measure could result in a disruption of service or theft of data.
$secret = env('BOLD_SECRET');
$body = $request->getContent();
$passedHMAC = $request->header('X-Boldplatform-Hmac');

$calculatedHMAC = base64_encode(hash_hmac('sha256', $body, $secret, true));

if (hash_equals($passedHMAC, $calculatedHMAC)) {
  // authenticated
}