Style the Checkout with CSS
Using Bold Checkout, you can style your store's checkout experience using CSS rules.
This page outlines how to style both kinds of checkout experience.
Bold-hosted checkout
The steps in this section outline how to style a Bold-hosted checkout flow.
CSS settings are store-level settings that apply across all Bold-hosted checkout flows on your store.
Prerequisites
Before you get started, complete the instructions outlined in the Checkout Getting Started guide.
Bold recommends first completing these steps on a local or development store to avoid undesired changes on your production store.
Identify CSS changes
Bold accepts standard-formatted CSS rules. Identify the classes you want to change by visiting the checkout page with Bold Checkout enabled and inspecting the page.
Some common CSS changes can be divided into several groups, outlined in the following table:
| Type | Description | Sample Class Values |
|---|---|---|
| Accents | Adjust color and style of the clickable links and form fields. | Button, a, InputField, ToggleField__Input, AppliedDiscount_Code |
| Hovers | Adjust the colors that appear when hovering over a button or link. | Button, a |
| Backgrounds | Adjust the color of the background in one of two locations: behind the form fields, or behind the order summary. | Checkout__Main, Checkout__Summary |
| Errors | Adjust the color of the error that appears when a customer's input is invalid. | Field__Message |
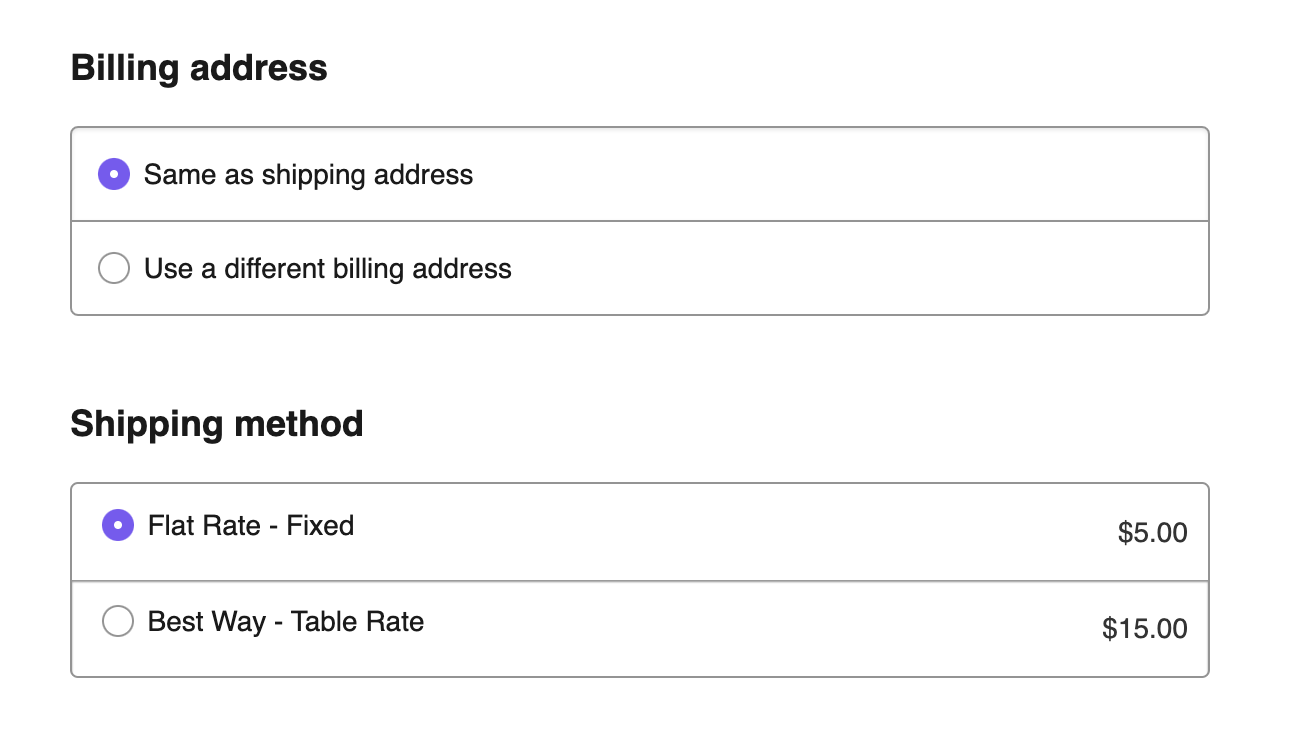
For example, to change the color of selected radio buttons to purple, you can use the following CSS:
.stx-radio-field .stx-radio--is-checked input {
  box-shadow: 0 0 0 6px #7a5af5 inset;
}
The following screenshot shows the outcome of this CSS change:
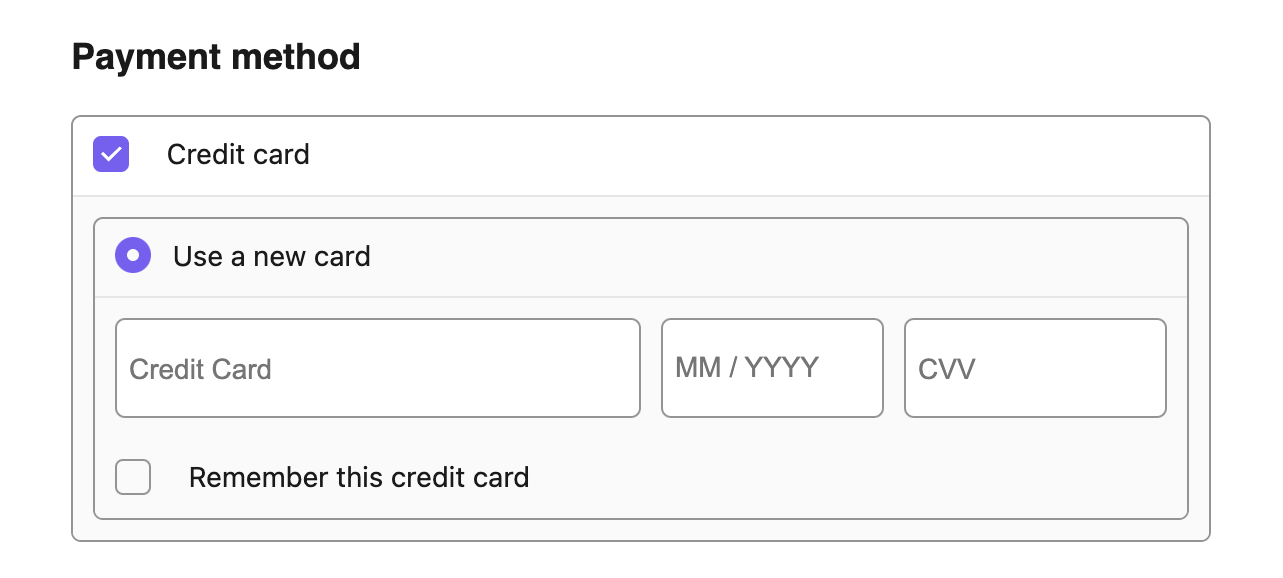
Secure Payment Interface
The Secure Payments Interface (SPI) is the interface that your customer uses to input their payment information. It is rendered using an iframe in order to keep the payment information secure. You can make minor CSS changes to this interface as well.
CSS changes that impact the SPI must use the identifier #iframe-payment-gateway.
For example, to apply the CSS rule from the previous section to the SPI, add the following to your CSS rules:
#iframe-payment-gateway .stx-radio-field .stx-radio--is-checked input {
  box-shadow: 0 0 0 6px #7a5af5 inset;
}
The following screenshot shows the outcome of this CSS change:
Apply CSS changes
Once you have determined the CSS changes you would like to make, apply them to your store with the following steps:
- Navigate to the Bold Checkout admin.
- In the left-hand menu, navigate to Settings > General settings.
- Scroll down until you find the Appearance section. In the Custom CSS field, paste your CSS code. Click Save.
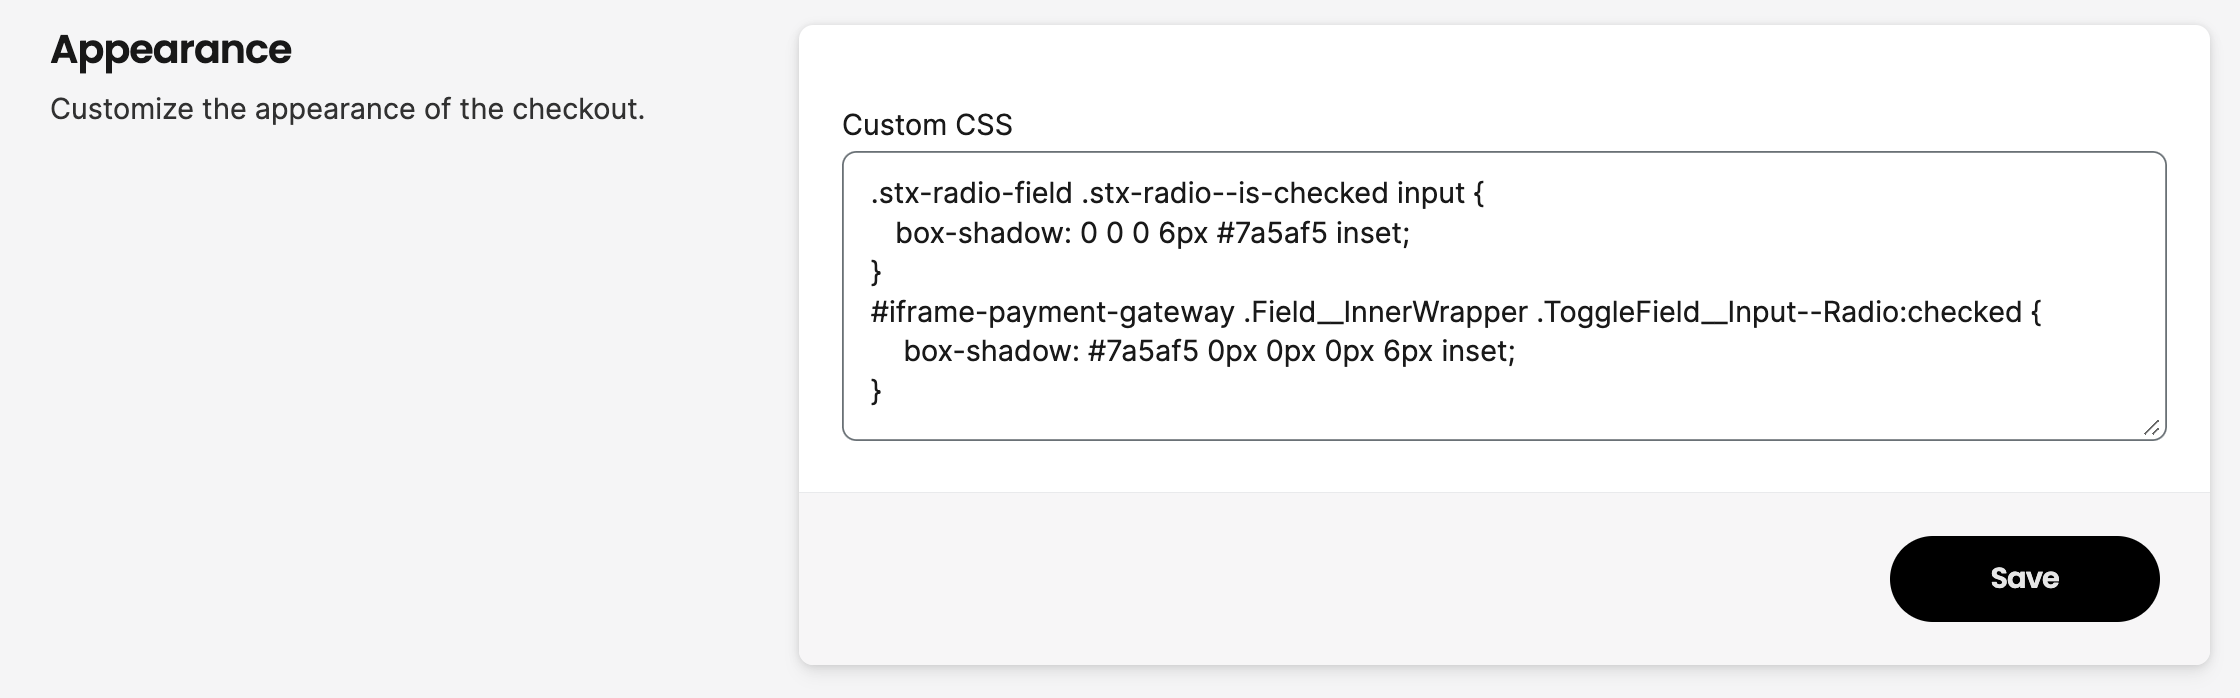
- Navigate to your storefront and refresh the page. The changes take effect immediately.
The Create Shop Payment Styling endpoint applies the styling to all orders for your store.
If you want to apply styling on a per-order basis, you must instead call the Create CSS Styling for SPI endpoint, which is authenticated with a JWT.
You can apply both CSS rules and media rules using this endpoint. Include the rules in JSON format, as shown in the following example call:
curl --request POST 'https://api.boldcommerce.com/checkout/shop/{shop_identifier}/payment_css' \
     --header 'Authorization: Bearer {API Access Token}' \
     --header 'Bold-API-Version-Date: 2022-05-01' \
     --header 'Content-Type: application/json' \
     --data '{
         "css_rules": [
             {
                 "cssText": ".ToggleField { color:red; }"
             }
         ],
         "media_rules": [
             {
                 "conditionText": "screen and (max-height: 600px)",
                 "cssRules": [
                     {
                         "cssText": ".ToggleField__Text { color:blue; }"
                     }
                 ]
             }
         ]
     }'
Navigate to your storefront and refresh the page. The changes take effect immediately.